About
The Smooth tool averages the differences between vertex positions along a axis (set by Direction). Use this mode to make your jagged vertices more uniform.
Usage
Select any mesh object, enter Smoothing mode, then click and drag while hovering over the selected mesh.
See the Brush Settings page for information on modifying brush radius, falloff, etc
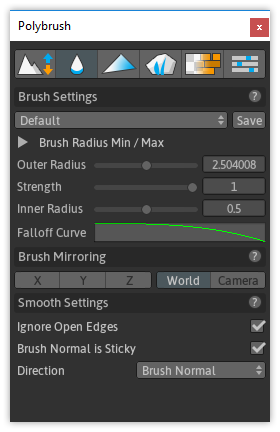
Smoothing Mode Settings
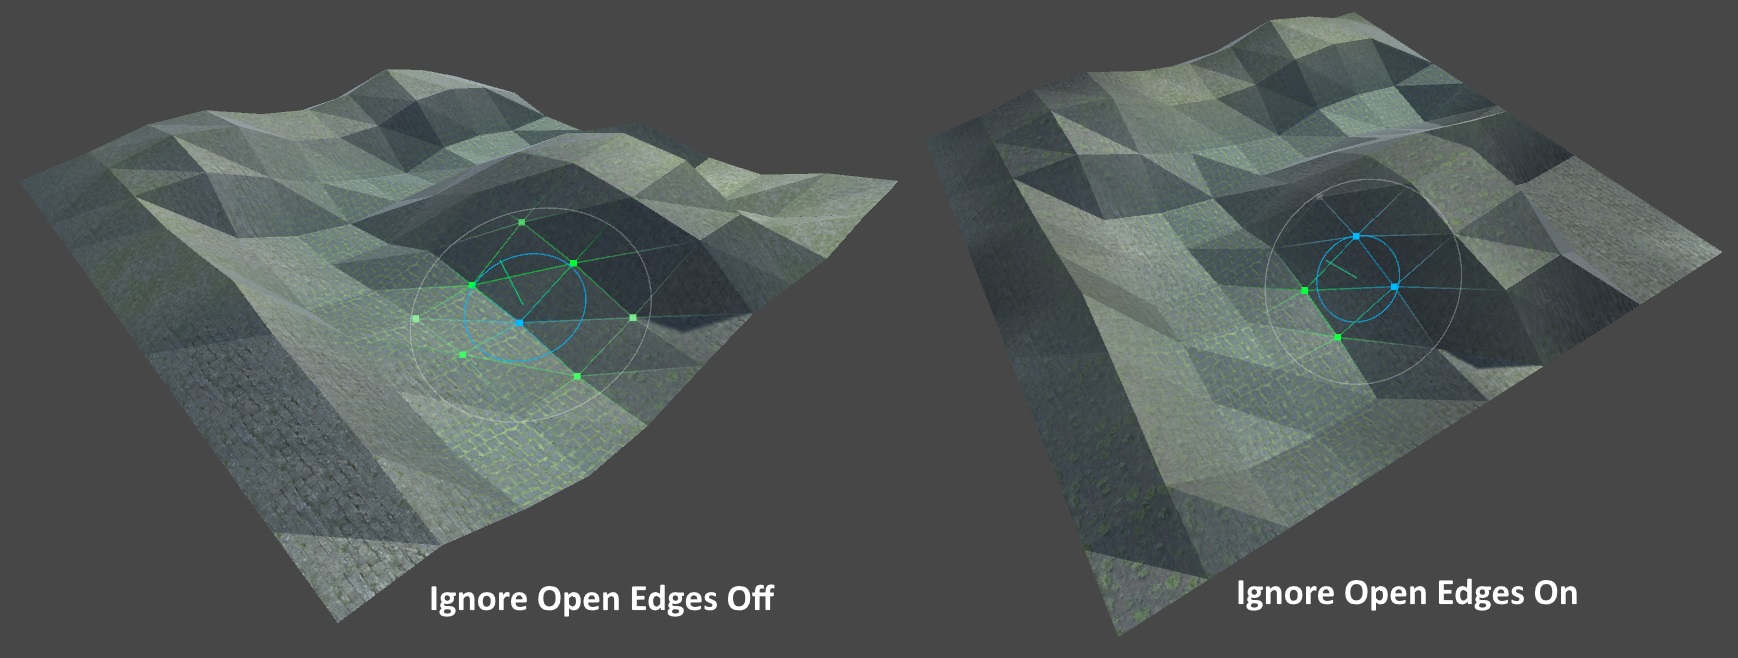
Ignore Open Edges
| Setting | Description |
|---|---|
| off | All vertices will be affected |
| ON | Vertices on the edge of the mesh will be ignored |
Brush Normal is Sticky
| Setting | Description |
|---|---|
| off | Vertex movement direction will be picked every frame, from the surface below the mouse |
| ON | Vertex movement direction will be chosen on click, and stick to that direction |
Direction
| Setting | Description |
|---|---|
| Up | Move vertices on the Y axis |
| Right | Move vertices on the X axis |
| Forward | Move vertices on the Z axis |
| Brush Normal | Move vertices in the Brush's "up" direction |
| Vertex Normal | Move each vertice along their own normals |
Tip: Use Vertex Normal on objects like spheres where you want the movement to be relative to the direction of the affected vertices.
Tip: In Smooth mode the Vertex Normal brush direction behaves slightly differently than you might expect - instead of constraining the movement path to the normal each vertex position will be averaged with it's neighbors. This is very handy for reducing large gaps in vertex positions and making your mesh look super-smooth.