Making Your First Matches
warning
This documentation is now deprecated. If you are using Matchmaker Self Serve though UDash, please use the documentation here.
Flow Overview#
There are four core elements that need to be implemented in order to get your first match from the matchmaker.
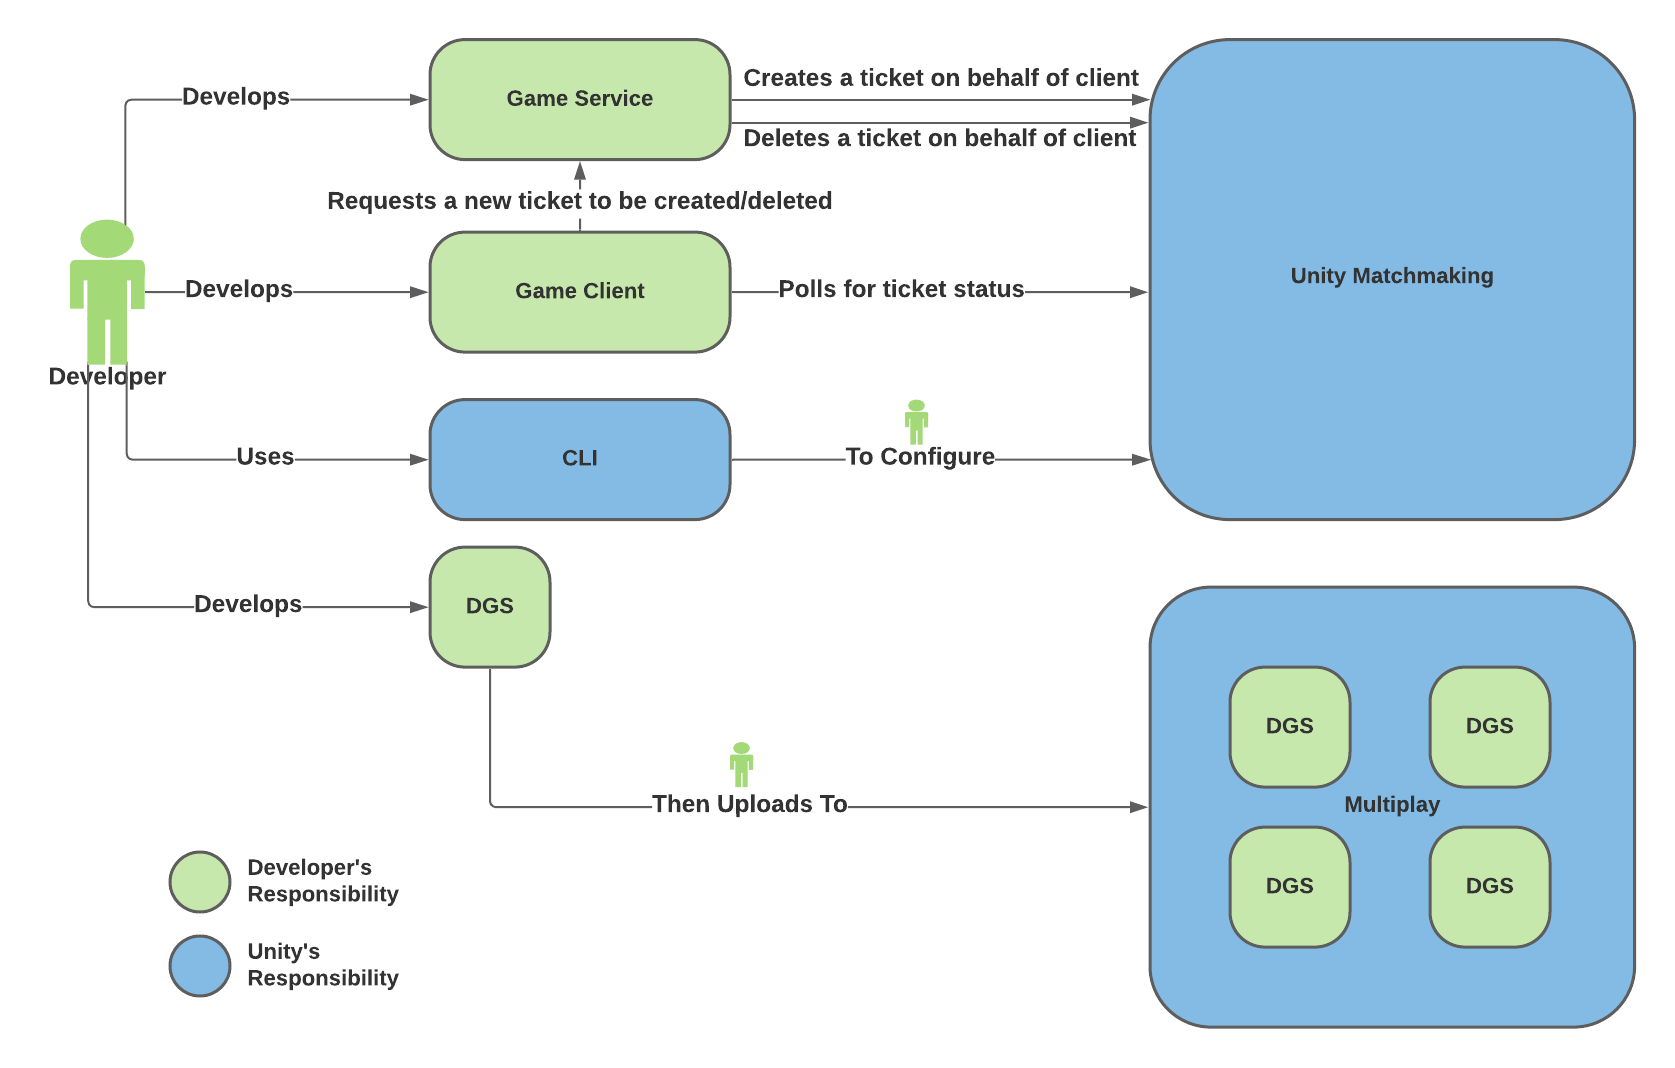
The following figure illustrates the flow used in this tutorial.
Prerequisites#
- As far as Unity Matchmaker is concerned, each player needs to have a unique identifier.
Game Client#
The game client handles the following processes:
- Authenticating the player credentials (Login)
- Requests a new multiplayer game from the Game Service
- Polls the status of the matchmaking ticket from the Matchmaking Logic
- Connects to the DGS on successful matchmaking
Game Service#
In the context of Unity Matchmaker, the game service serves as a proxy between game clients and Unity Matchmaker, and is responsible for the following processes:
- Authorizes & Authenticates itself with the player identity service
- Listens for the following requests from the game clients:
- Matchmaking read token request
- Ticket creation request
- Ticket deletion request
- Creating tickets on the Matchmaking Logic
- Deletes the matchmaking (ticket) request
Dedicated Game Server (DGS)#
The DGS is a game server that exposes a port for game clients to connect to and is responsible for the following processes:
- Managing the game cycle
- Actively listens on a port for game clients to connect
- Verifies that teams are full
- (optional) Creates a backfill ticket on the matchmaking logic if teams are not full (check Advanced Topics for more information)
Matchmaking Logic#
The matchmaking logic is configured using a json formatted config file. The config file is then uploaded to Unity Matchmaker using an API.
Creating a Config File#
A config file is how a developer is able to control how the matchmaking logic works.
The following example config file configures the matchmaking logic to match tickets based on the following:
Two teams
HuntersandMonsters, each team consists of 1 to 2 players.The QoS strategy is set to
DefaultRegionto ignore all QoS information in tickets and match players into a predefined QoS region ID.The
platformattribute is used to isolate tickets based on the platform for the ticket. The values here are arbitrary and should match what the Game Service provides in the ticket.
The main fields to replace with your values are: Matchmaking.Config.QoSConfig.DefaultQoSRegion, Multiplay.Profile, Multiplay.Access, Multiplay.Secret, and Multiplay.FleetId.
Uploading a Config File#
To upload the config file, you can download and use the Matchmaking CLI. Steps to upload the config file using the CLI:
What's Next?#
- Configure backfill in the Backfill Tutorial