Unity Game Simulation Tutorial
This guide walks through how to set up a sample project to run simulations in Unity Game Simulation. The sample project can be downloaded here.
What is the sample project
The sample project contains one sample scene and a game controller script that is attached to the main camera. This project is set to run and simulate for 2 minutes. In these two minutes, there is a simple counter that gets incremented by 1 every second.
We will illustrate how to implement the Game Simulation Unity package and change how much the simple counter gets incremented by through the Game Simulation dashboard.
The final results will be the final simple counter value and how long it took the simulation to finish for each of the different settings.
This project will be demonstrated using Unity 2019.3. The required Game Simulation Unity package is already added in the package manifest.json file.
Let's get started!
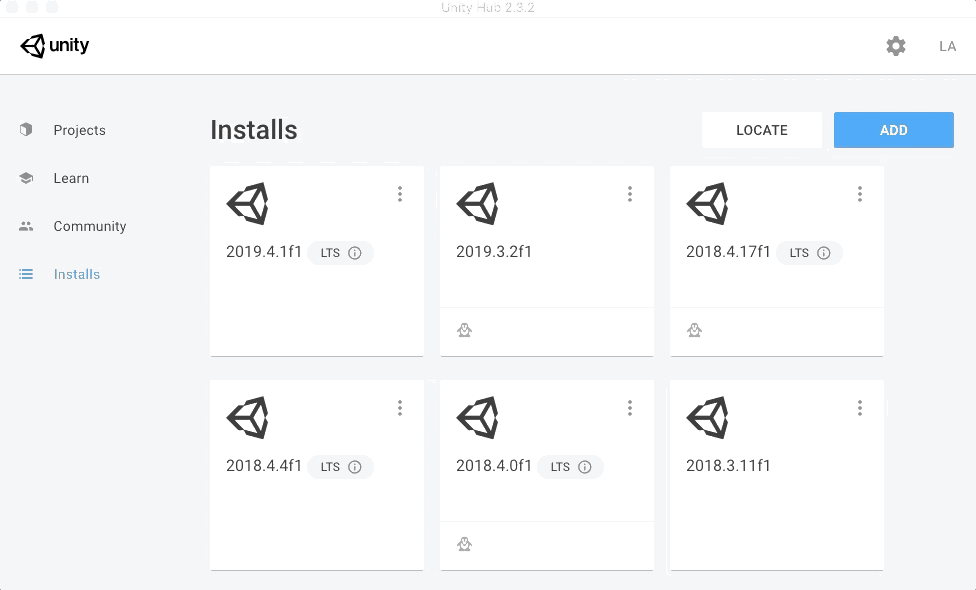
Step 0 - Add the Linux Build Module to your version of Unity
Game Simulation currently requires a Linux build, which requires the Linux Build Module to be installed for your selected version of Unity:
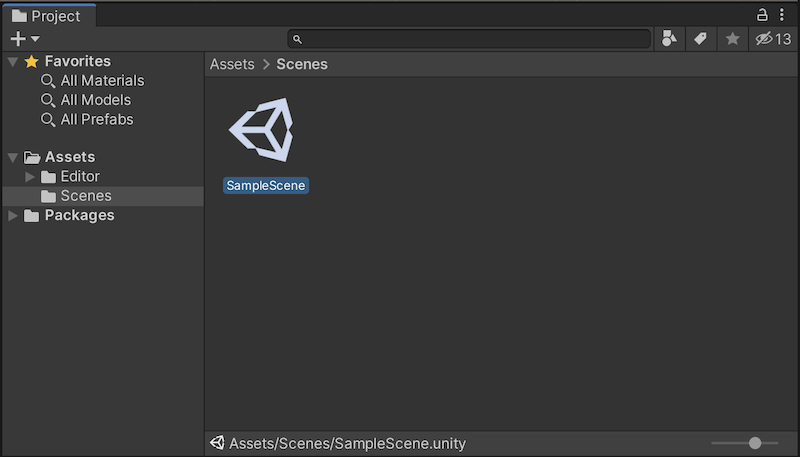
Step 1 - Open the sample scene
Open the project with your selected version of Unity, then navigate to the sample scene in Assets > Scenes
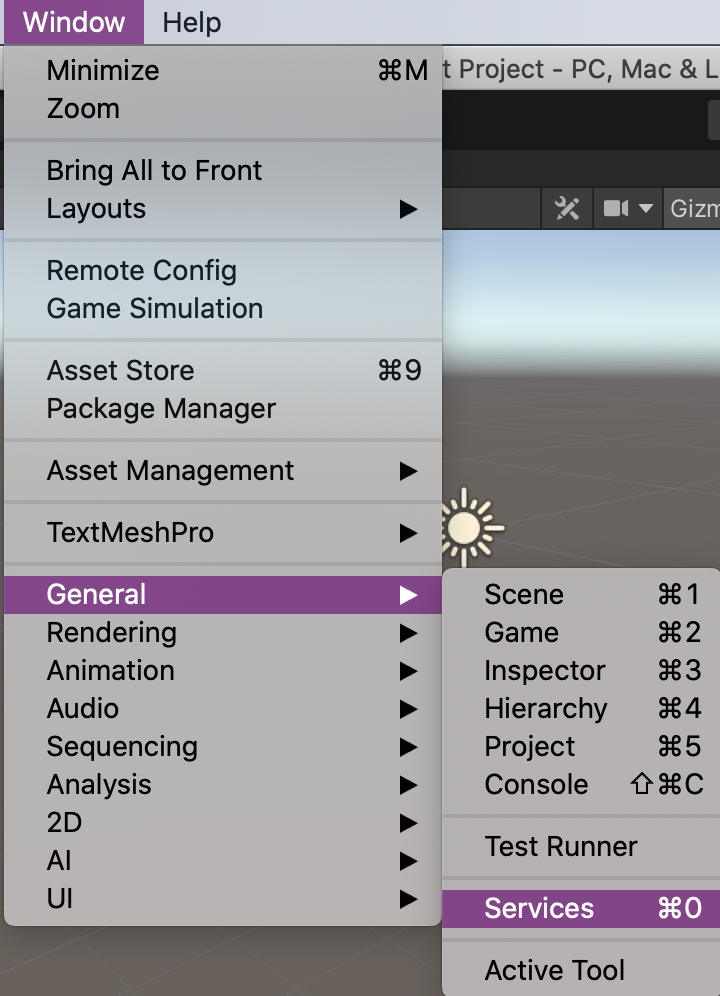
Step 2 - Enable services in the project
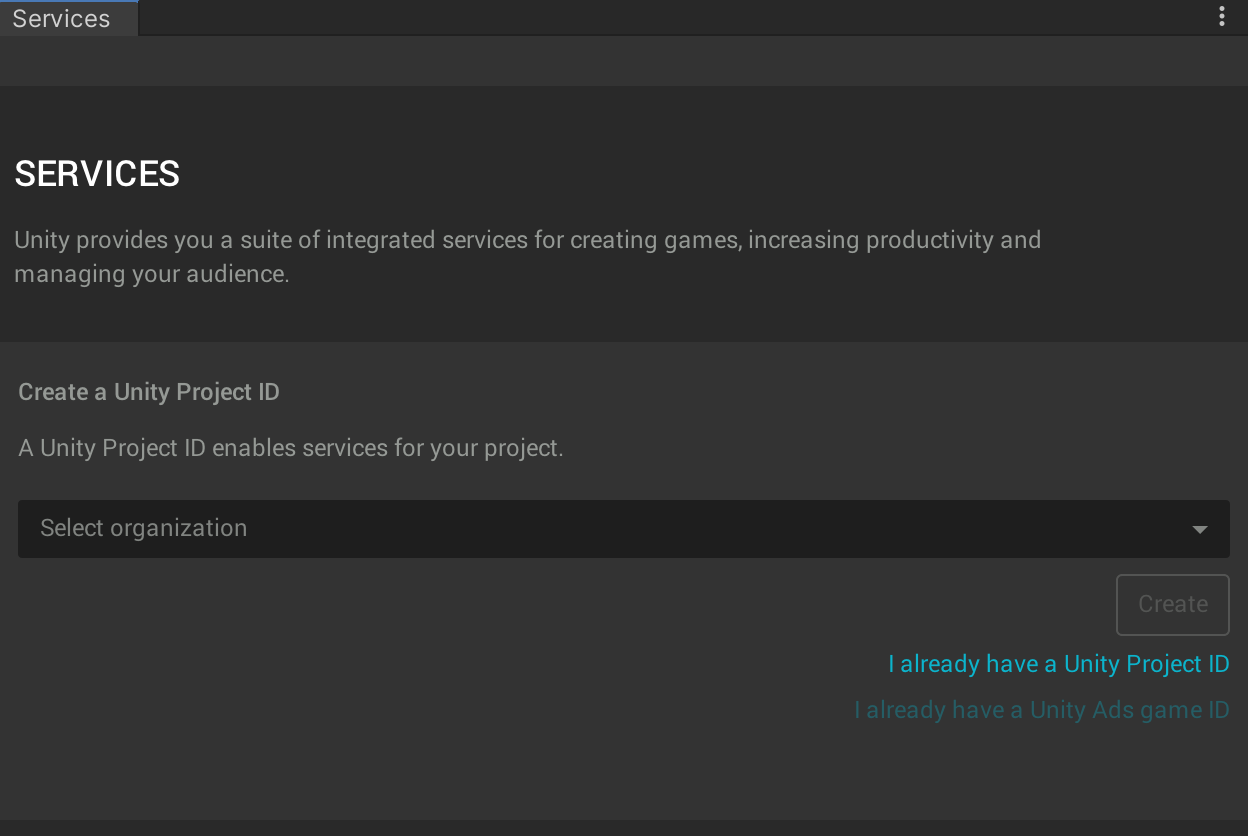
In order to use Unity Game Simulation, you must enable services in the Unity project. Click on Window -> General -> Services to open the services window.
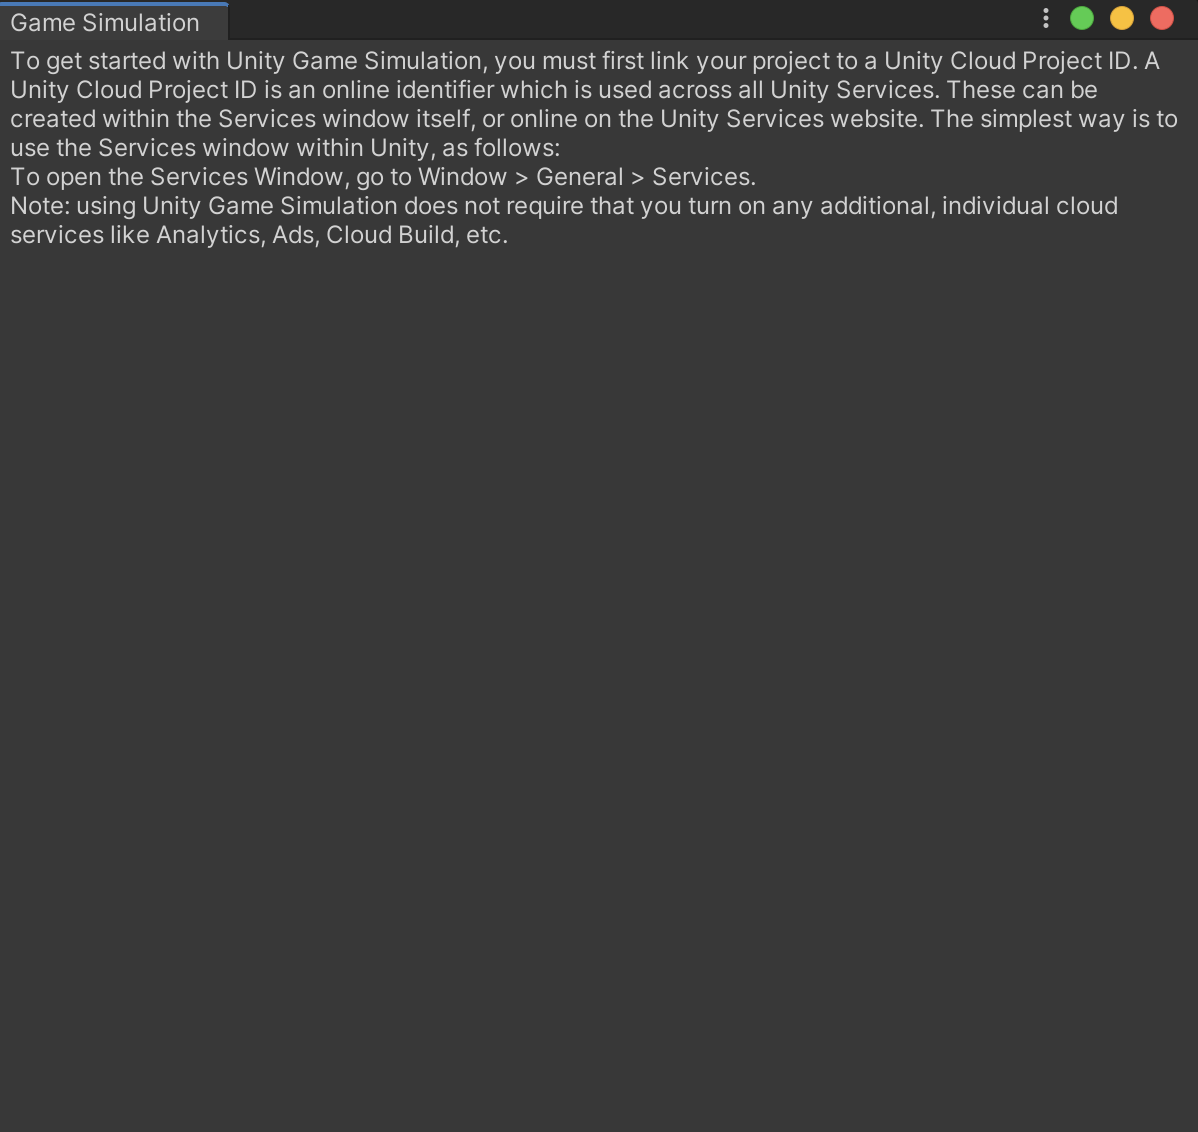
If you try to open the Game Simulation window, you will get the below error.
Go into the services window and first select your organization.
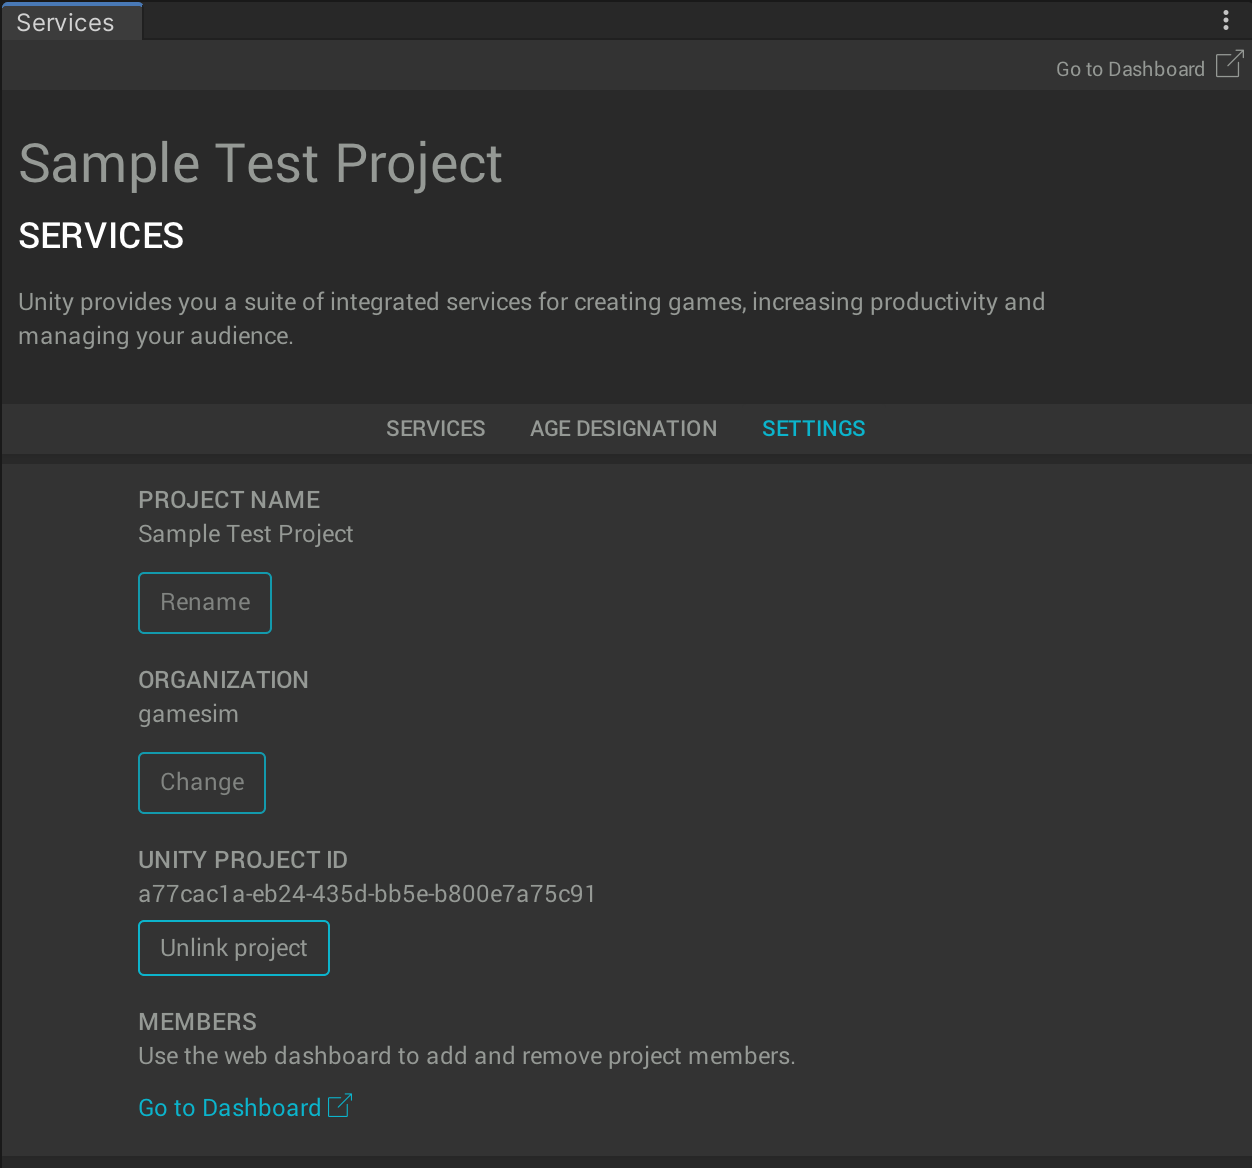
Click on the settings tab and make sure there is a project ID assigned and looks something like the below screenshot.
Step 3 - Create a Game Simulation parameters
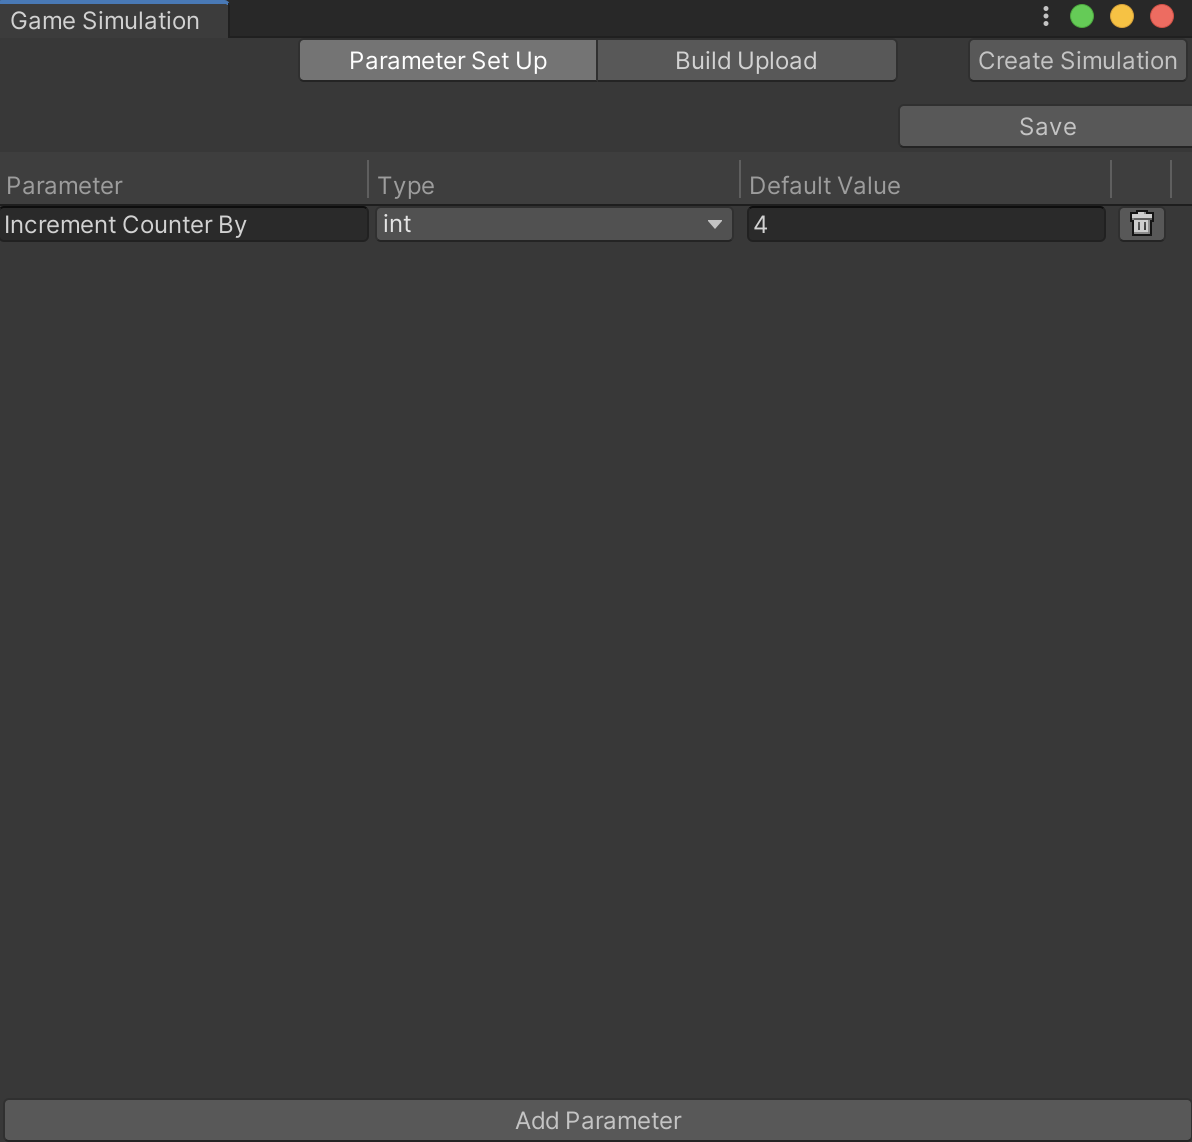
Once you have enabled services for the project, go to Window -> Game Simulation. Click on the tab called Parameter Set Up and click on Add Parameter. Create a parameter called “Increment Counter By”, type “Int”, and Default Value of 4. It is very important that you enter in the parameter name “Increment Counter By” exactly with case sensitivity.
Then hit save.
Step 4 - Test to make sure it works
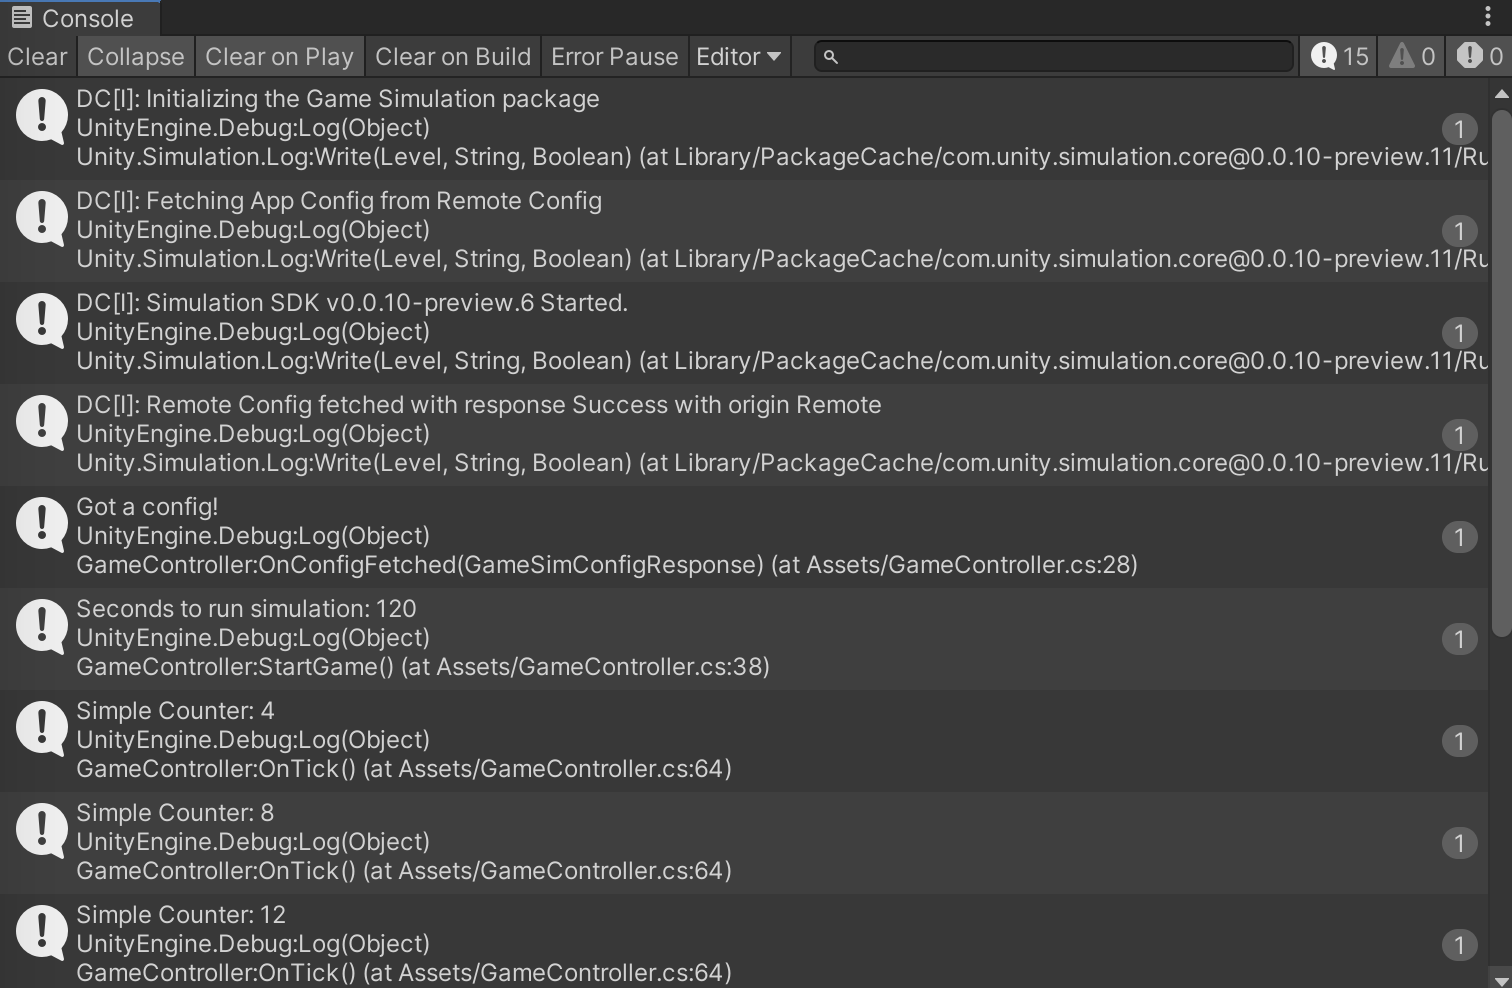
Before we upload the build, click on the Play button. You should see the parameter being fetched and the simple counter incrementing by 4 each time.
Step 5 - Upload to Game Simulation
Go to Window -> Game Simulation. Click on the tab called Build Upload. Make sure SampleScene.unity is selected in Scenes in Build. Name the Build Name “SampleTestProject”. Then click upload.
Once done uploading, click Create Simulation in the top right corner. You will need to login with your Unity ID.

Step 6 - Run a simulation
From the dashboard, you can setup and run a simulation. Enter a name for the simulation. Select the build that we just uploaded. You may notice the build indicate it has not yet been verified. This usually takes about 5-10 minutes.
In the parameters, you will see “Increment Counter By”. We want to run the simulation by incrementing the simple counter by 1, 2, 3 and 4. Enter “1,2,3,4” here. And for each of these 4 different “Increment Counter By”, we want to run 10 times each. After you enter these in, click on run.
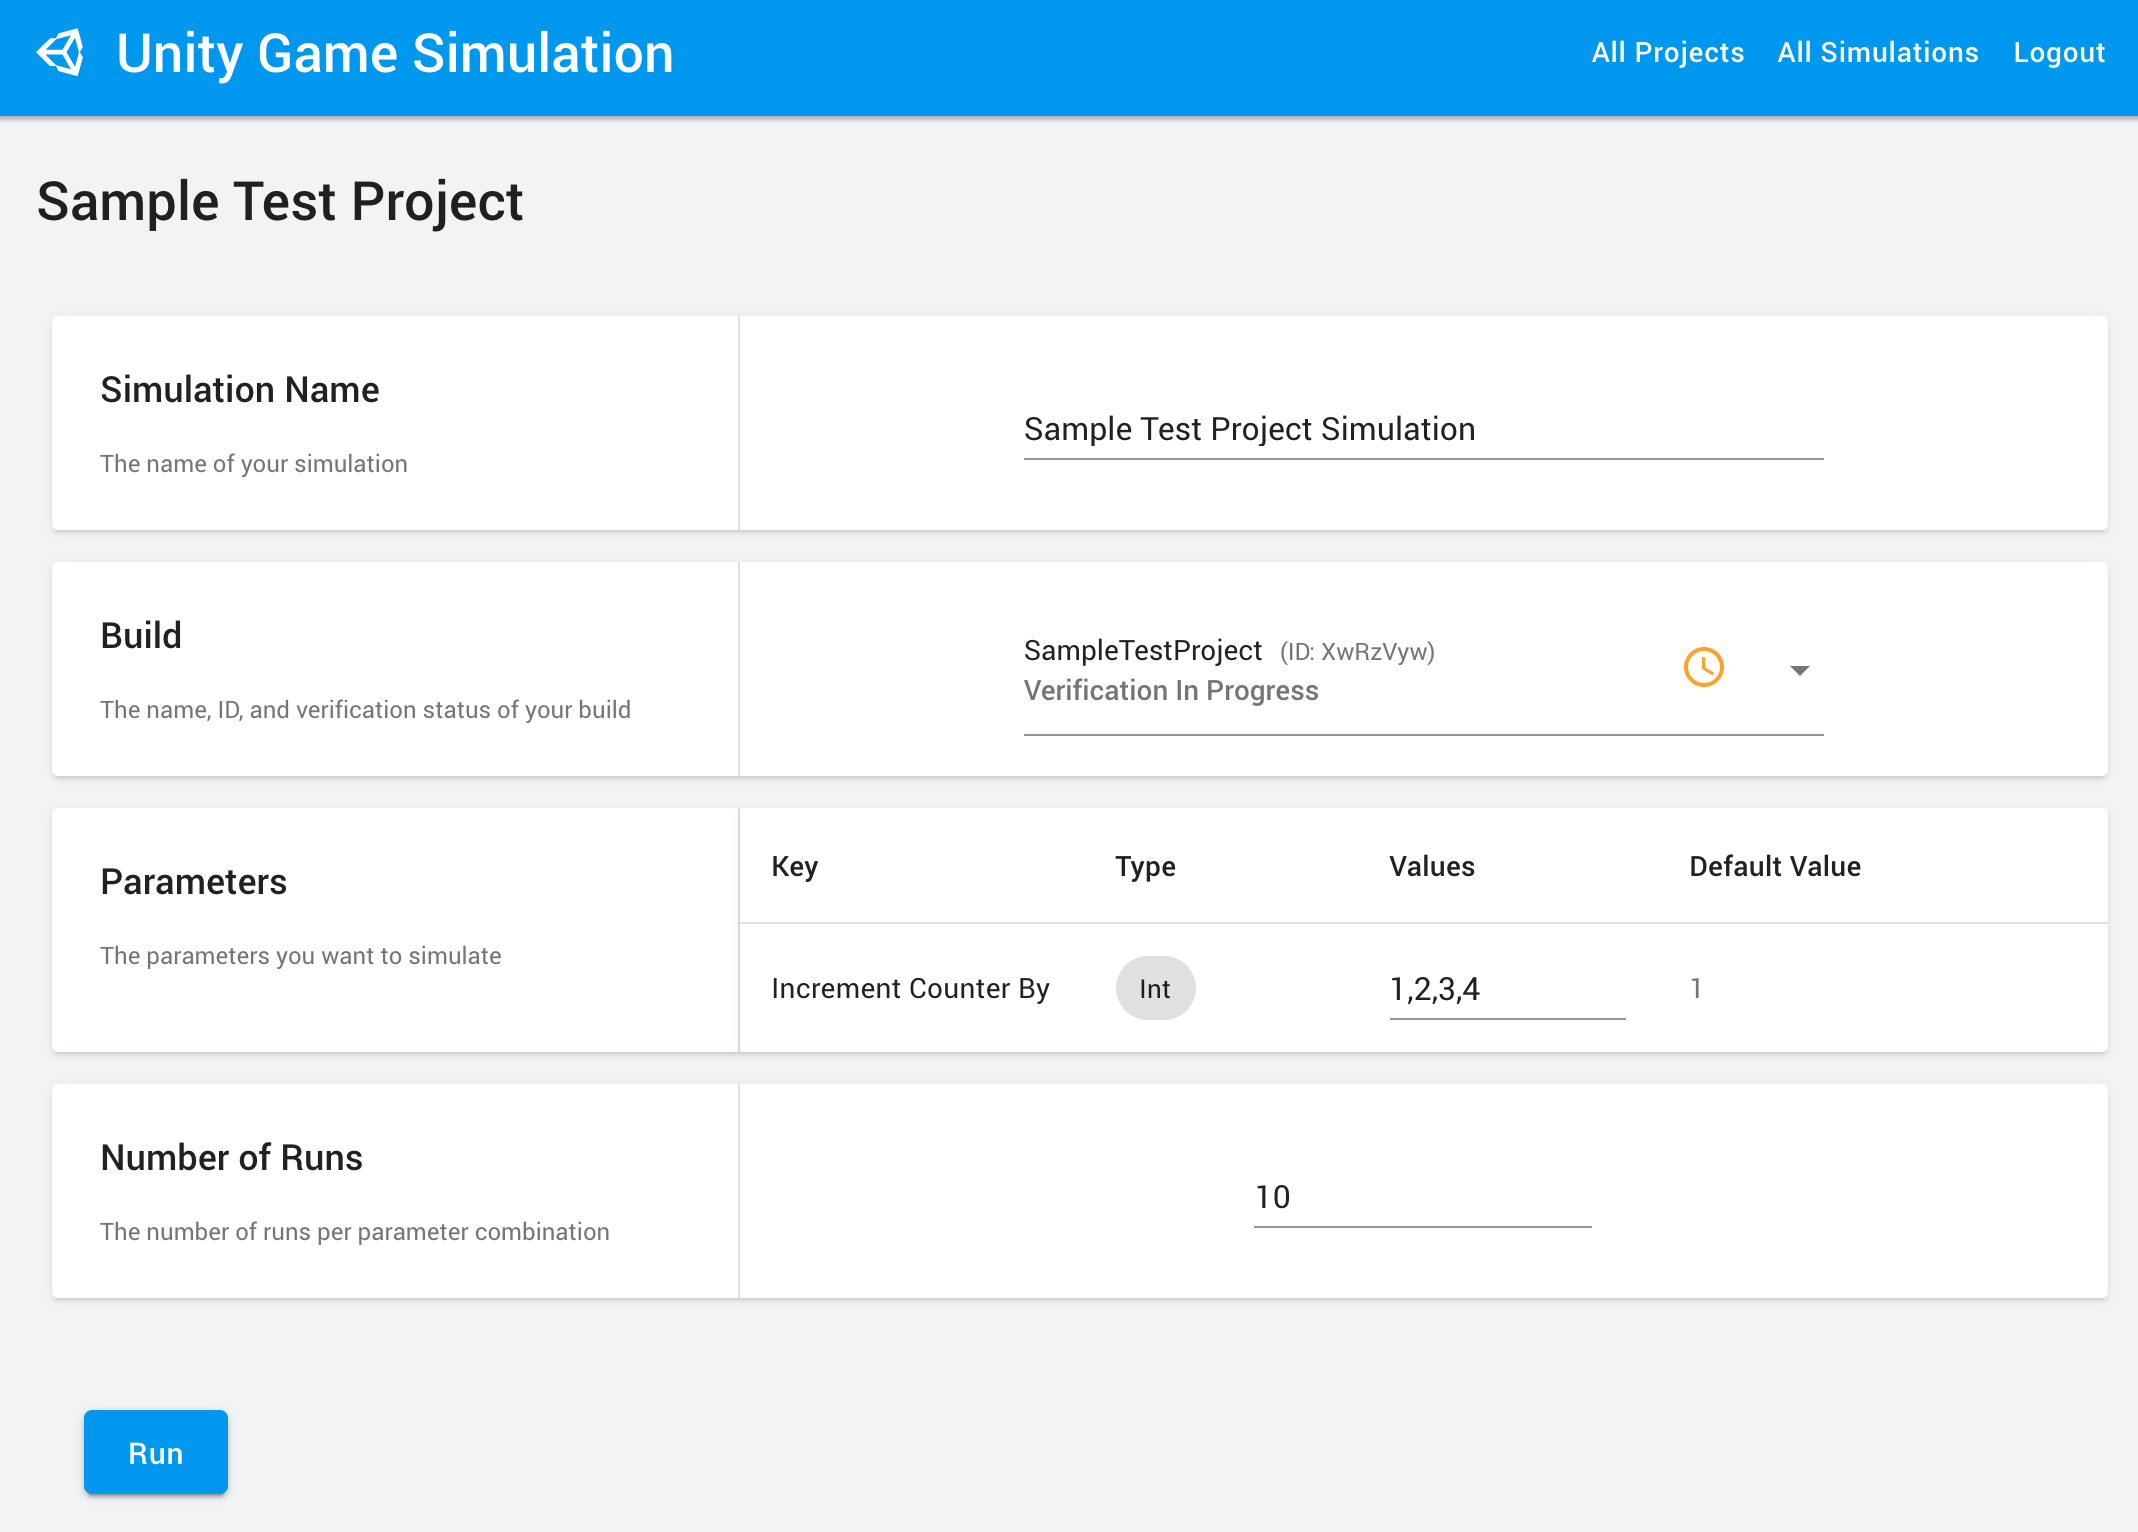
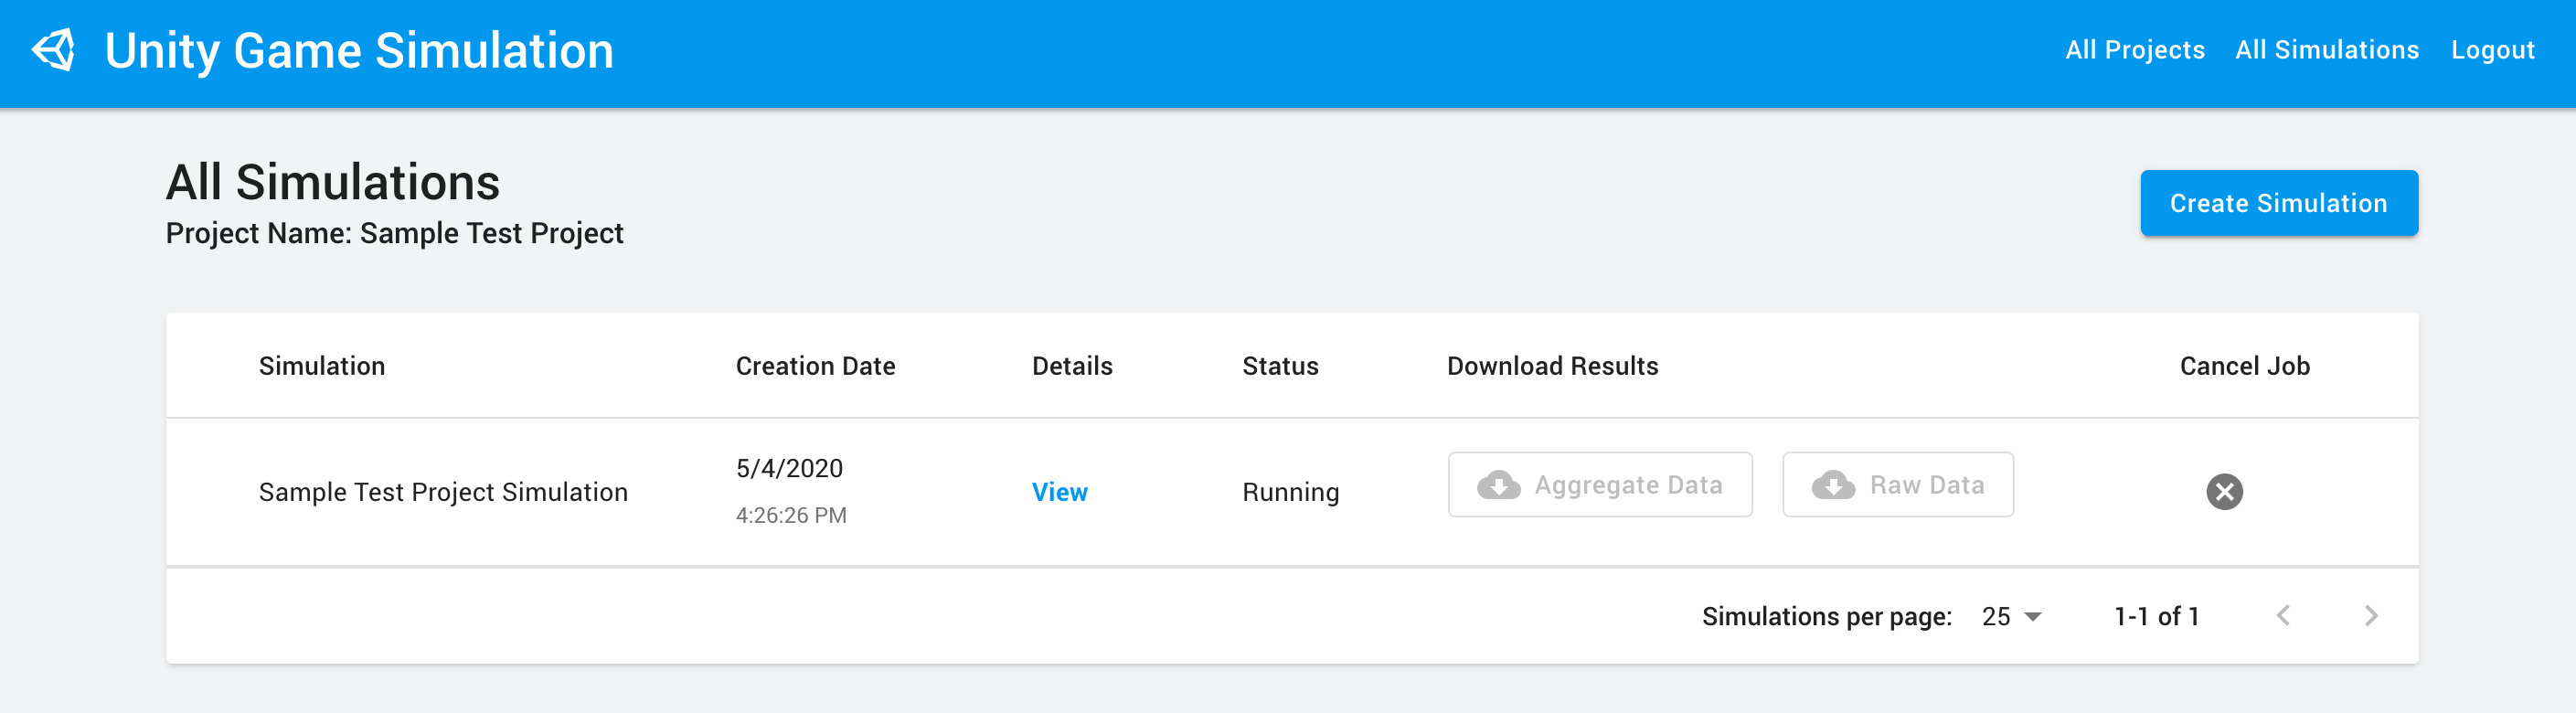
You should now see your simulation running.
Step 7 - Download the results
After 5 to 10 minutes, the results will be available to download. You may need to hit refresh. You can compare your results with the set here:
Need help or have questions?
We are happy to help. Please reach out to us on the Unity Game Simulation Forum.
Last updated Oct 26, 2020